Running Your Flask Application Over HTTPS
[ ]Miguel Grinberg has talked about how to run Flask over https in his article Running Your Flask Application Over HTTPS.
I have summarized the most important sections below.
The Simplest Way To Do It
Flask, and more specifically Werkzeug, support the use of on-the-fly certificates, which are useful to quickly serve an application over HTTPS without having to mess with certificates. All you need to do, is add ssl_context=’adhoc’ to your app.run() call. As an example, below you can see the “Hello, World” Flask application from the official documentation, with TLS encryption added:
from flask import Flask
app = Flask(__name__)

@app.route("/")
def hello():
    return "Hello World!"

if __name__ == "__main__":
    app.run(ssl_context='adhoc')
To use ad hoc certificates with Flask, you need to install an additional dependency in your virtual environment:
$ pip install pyopenssl
When you run the script, you will notice that Flask indicates that it is running an https:// server:
$ python hello.py
 * Running on https://127.0.0.1:5000/ (Press CTRL+C to quit)
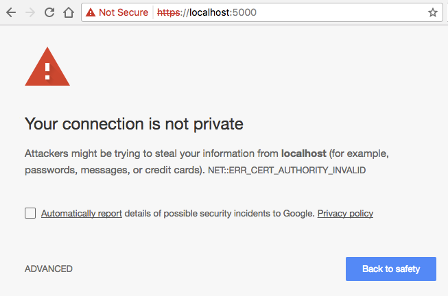
Simple, right? The problem is that browsers do not like this type of certificate, so they show a big and scary warning that you need to dismiss before you can access the application. Once you allow the browser to connect, you will have an encrypted connection, just like what you get from a server with a valid certificate, which make these ad hoc certificates convenient for quick & dirty tests, but not for any real use.
Self-Signed Certificates
While self-signed certificates can be useful sometimes, the ad hoc certificates from Flask are not that great, because each time the server runs, a different certificate is generated on the fly through pyOpenSSL. When you are working with a self-signed certificate, it is better to have the same certificate used every time you launch your server, because that allows you to configure your browser to trust it, and that eliminates the security warnings.
You can generate self-signed certificates easily from the command line. All you need is to have openssl installed:
openssl req -x509 -newkey rsa:4096 -nodes -out cert.pem -keyout key.pem -days 365
This command writes a new certificate in cert.pem with its corresponding private key in key.pem, with a validity period of 365 days. When you run this command, you will be asked a few questions. We can now use this new self-signed certificate in our Flask application by setting the ssl_context argument in app.run() to a tuple with the filenames of the certificate and private key files:
from flask import Flask
app = Flask(__name__)

@app.route("/")
def hello():
    return "Hello World!"

if __name__ == "__main__":
    app.run(ssl_context=('cert.pem', 'key.pem'))
Using Production Web Servers
Of course we all know that the Flask development server is only good for development and testing. So how do we install an SSL certificate on a production server?
Gunicorn
If you are using gunicorn, you can do this with command line arguments:
$ gunicorn --certfile cert.pem --keyfile key.pem -b 0.0.0.0:8000 hello:app
Nginx
If you use nginx as a reverse proxy, then you can configure the certificate with nginx, and then nginx can “terminate” the encrypted connection, meaning that it will accept encrypted connections from the outside, but then use regular unencrypted connections to talk to your Flask backend. This is a very useful set up, as it frees your application from having to deal with certificates and encryption. The configuration items for nginx are as follows:
server {
    listen 443 ssl;
    server_name example.com;
    ssl_certificate /path/to/cert.pem;
    ssl_certificate_key /path/to/key.pem;
    # ...
}
How to handle unsafe traffic
Another important item you need to consider is how are clients that connect through regular HTTP going to be handled. The best solution, in my opinion, is to respond to unencrypted requests with a redirect to the same URL but on HTTPS. For a Flask application, you can achieve that using the Flask-SSLify extension. With nginx, you can include another server block in your configuration:
server {
    listen 80;
    server_name example.com;
    location / {
        return 301 https://$host$request_uri;
    }
}
Using “Real” Certificates
When you request a certificate from a CA, this entity is going to verify that you are in control of your server and domain, but how this verification is done depends on the CA. If the server passes this verification then the CA will issue a certificate for it with its own signature and give it to you to install. The certificate is going to be good for a period of time that is usually not longer than a year. Most CAs charge money for these certificates, but there are a couple that offer them for free. The most popular free CA is called Let’s Encrypt.
Getting a certificate from Let’s Encrypt is fairly easy, since the whole process is automated. Assuming you are using an Ubuntu based server, you have to begin by installing their open source certbot tool on your server:
$ sudo apt-get install software-properties-common
$ sudo add-apt-repository ppa:certbot/certbot
$ sudo apt-get update
$ sudo apt-get install certbot
The command to request a certificate with this method is as follows:
$ sudo certbot certonly --webroot -w /var/www/example -d example.com
In this example, we are trying to generate a certificate for a example.com domain, which uses the directory in /var/www/example as a static file root. If certbot is able to verify the domain, it will write the certificate file as /etc/letsencrypt/live/example.com/fullchain.pem and the private key as /etc/letsencrypt/live/example.com/privkey.pem, and these are going to be valid for a period of 90 days.
If you are using nginx as reverse proxy, you can take advantage of the powerful mappings that you can create in the configuration to give certbot a private directory where it can write its verification files. In the following example, I extended the HTTP server block shown in the previous section to send all Let’s Encrypt related requests to a specific directory of your choice:
server {
    listen 80;
    server_name example.com;
    location ~ /.well-known {
        root /path/to/letsencrypt/verification/directory;
    }
    location / {
        return 301 https://$host$request_uri;
    }
}
Certbot is also used when you need to renew the certificates. To do that, you simply issue the following command:
$ sudo certbot renew
Achieving an SSL A+ Grade
If you use a certificate from Let’s Encrypt or another known CA for your production site and you are running a recent and maintained operating system on this server, you are likely very close to have a top-rated server in terms of SSL security. You can head over to the Qualys SSL Labs site and get a report to see where you stand.
One of the areas in which it is easy to make an improvement is in how the coefficients that are used during the encryption key exchange are generated, which usually have defaults that are fairly weak. Using the openssl tool, you can run the following command:
openssl dhparam -out /path/to/dhparam.pem 2048
when it’s done, you will have a dhparam.pem file with strong coefficients that you can plug into the ssl server block in nginx:
ssl_dhparam /path/to/dhparam.pem;
Next, you will probably need to configure which ciphers the server allows for the encrypted communication. This is the list that I have on my server:
ssl_ciphers 'ECDHE-RSA-AES128-GCM-SHA256:ECDHE-ECDSA-AES128-GCM-SHA256:ECDHE-RSA-AES256-GCM-SHA384:ECDHE-ECDSA-AES256-GCM-SHA384:DHE-RSA-AES128-GCM-SHA256:DHE-DSS-AES128-GCM-SHA256:kEDH+AESGCM:ECDHE-RSA-AES128-SHA256:ECDHE-ECDSA-AES128-SHA256:ECDHE-RSA-AES128-SHA:ECDHE-ECDSA-AES128-SHA:ECDHE-RSA-AES256-SHA384:ECDHE-ECDSA-AES256-SHA384:ECDHE-RSA-AES256-SHA:ECDHE-ECDSA-AES256-SHA:DHE-RSA-AES128-SHA256:DHE-RSA-AES128-SHA:DHE-DSS-AES128-SHA256:DHE-RSA-AES256-SHA256:DHE-DSS-AES256-SHA:DHE-RSA-AES256-SHA:AES128-GCM-SHA256:AES256-GCM-SHA384:AES128-SHA256:AES256-SHA256:AES128-SHA:AES256-SHA:AES:CAMELLIA:!DES-CBC3-SHA:!aNULL:!eNULL:!EXPORT:!DES:!RC4:!MD5:!PSK:!aECDH:!EDH-DSS-DES-CBC3-SHA:!EDH-RSA-DES-CBC3-SHA:!KRB5-DES-CBC3-SHA';
In this list, disabled ciphers are prefixed with a !.
Summary
Below you can find my current nginx SSL configuration, which includes the above settings, plus a few more that I added to address warnings from the SSL report:
server {
    listen 443 ssl;
    server_name example.com;
    ssl_certificate /path/to/cert.pem;
    ssl_certificate_key /path/to/key.pem;
    ssl_dhparam /path/to/dhparam.pem;
    ssl_ciphers 'ECDHE-RSA-AES128-GCM-SHA256:ECDHE-ECDSA-AES128-GCM-SHA256:ECDHE-RSA-AES256-GCM-SHA384:ECDHE-ECDSA-AES256-GCM-SHA384:DHE-RSA-AES128-GCM-SHA256:DHE-DSS-AES128-GCM-SHA256:kEDH+AESGCM:ECDHE-RSA-AES128-SHA256:ECDHE-ECDSA-AES128-SHA256:ECDHE-RSA-AES128-SHA:ECDHE-ECDSA-AES128-SHA:ECDHE-RSA-AES256-SHA384:ECDHE-ECDSA-AES256-SHA384:ECDHE-RSA-AES256-SHA:ECDHE-ECDSA-AES256-SHA:DHE-RSA-AES128-SHA256:DHE-RSA-AES128-SHA:DHE-DSS-AES128-SHA256:DHE-RSA-AES256-SHA256:DHE-DSS-AES256-SHA:DHE-RSA-AES256-SHA:AES128-GCM-SHA256:AES256-GCM-SHA384:AES128-SHA256:AES256-SHA256:AES128-SHA:AES256-SHA:AES:CAMELLIA:!DES-CBC3-SHA:!aNULL:!eNULL:!EXPORT:!DES:!RC4:!MD5:!PSK:!aECDH:!EDH-DSS-DES-CBC3-SHA:!EDH-RSA-DES-CBC3-SHA:!KRB5-DES-CBC3-SHA';
    ssl_protocols TLSv1 TLSv1.1 TLSv1.2;
    ssl_session_timeout 1d;
    ssl_session_cache shared:SSL:50m;
    ssl_stapling on;
    ssl_stapling_verify on;
    add_header Strict-Transport-Security max-age=15768000;
    # ...
}